
The first year of gardening here in the high desert, we started with 8 raised beds and a couple of potato growing bags. By the second season we had added a lot more raised beds and built 4 potato growing cages. About mid-season it became apparent we were going to end up with more produce than we could eat before it started going bad.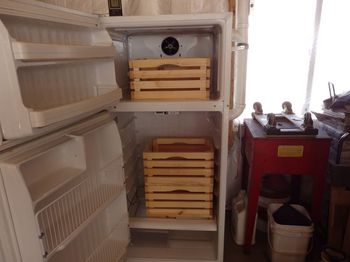 We needed a place to store the extra so started researching DIY root cellars. Most are built into hills or partially underground for temperature control. But around here that would not be easy. Any hole dug into the ground would be subject to flooding from snow melt or cave-ins. Besides, we didn't need something as large as a full blown root cellar.
There are three things necessary for long-term fresh food storage: temperature and humidity control and ventilation. We came across a lot of info on the Internet regarding the use of old refrigerators or chest freezers as small "root cellars." However, every idea we came across described burying the unit on the north side of a building for temperature control. All the north sides of our buildings would be subject to huge snow drifts as accumulation slides off the metal roof.
However, we had the next best thing - the shop. The shop is fully insulated and has a wood stove if necessary for winter projects. It also has a 500 gallon water storage tank close to the wood stove. That thermal mass (with a small booster fire if necessary) keeps the shop from freezing. In fact, the inside temperature usually stays between 40-50 degrees in the winter.
That (along with controllable outside ventilation) takes care of the temperature control - so we decided to repurpose an old non-working top freezer refrigerator into an experimental free-standing "root cellar." We found a nice clean one that was headed to the dump or recycle and gave it a new purpose in life.
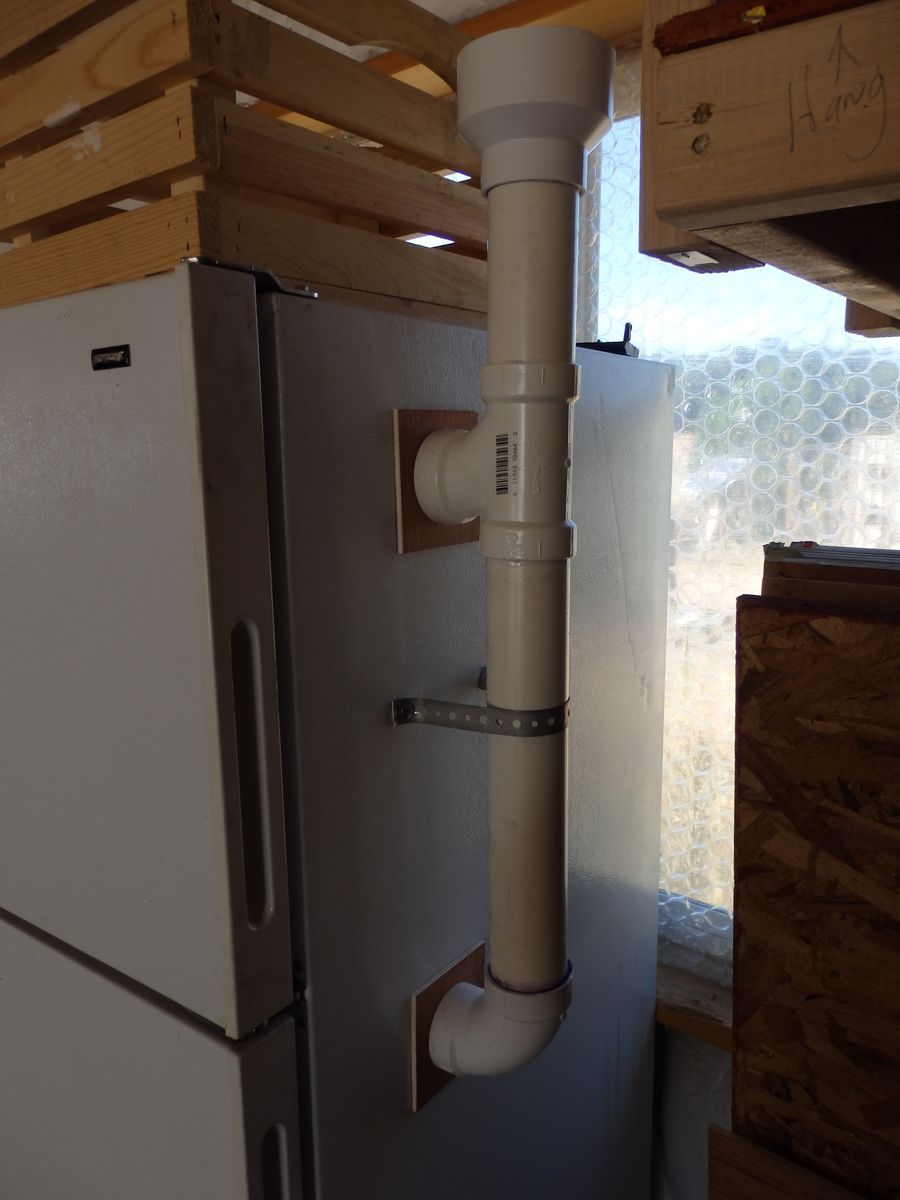
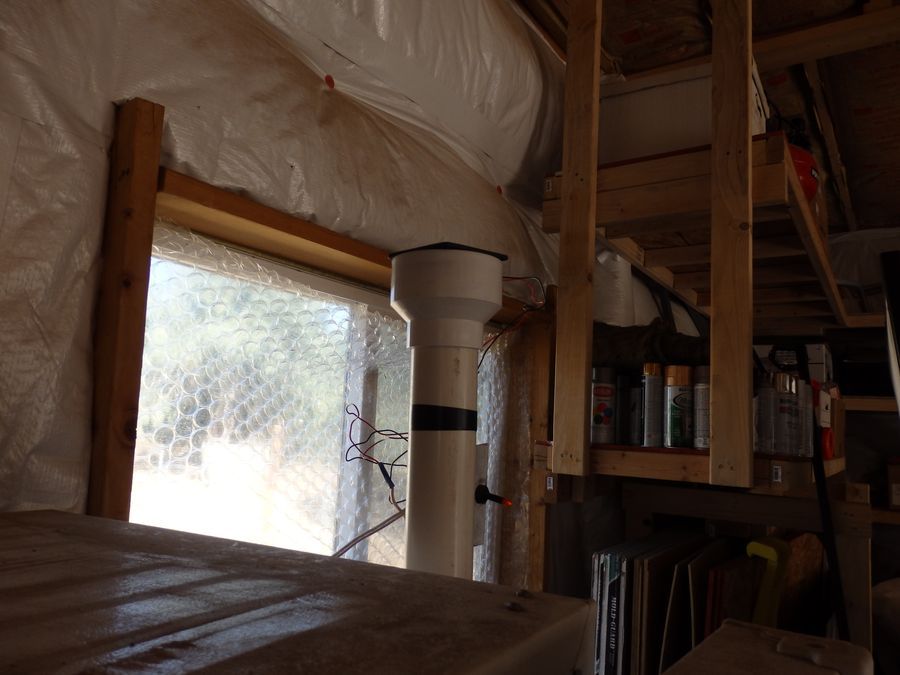
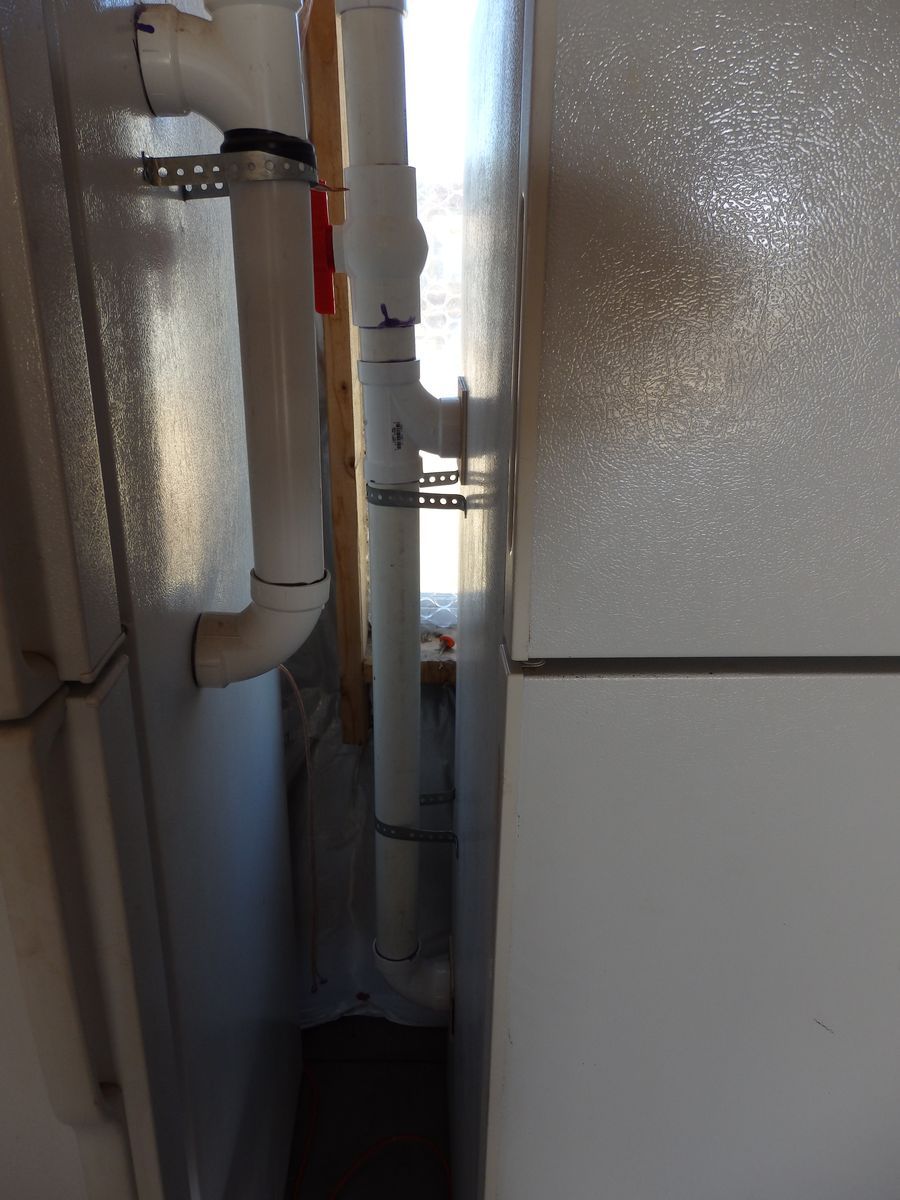
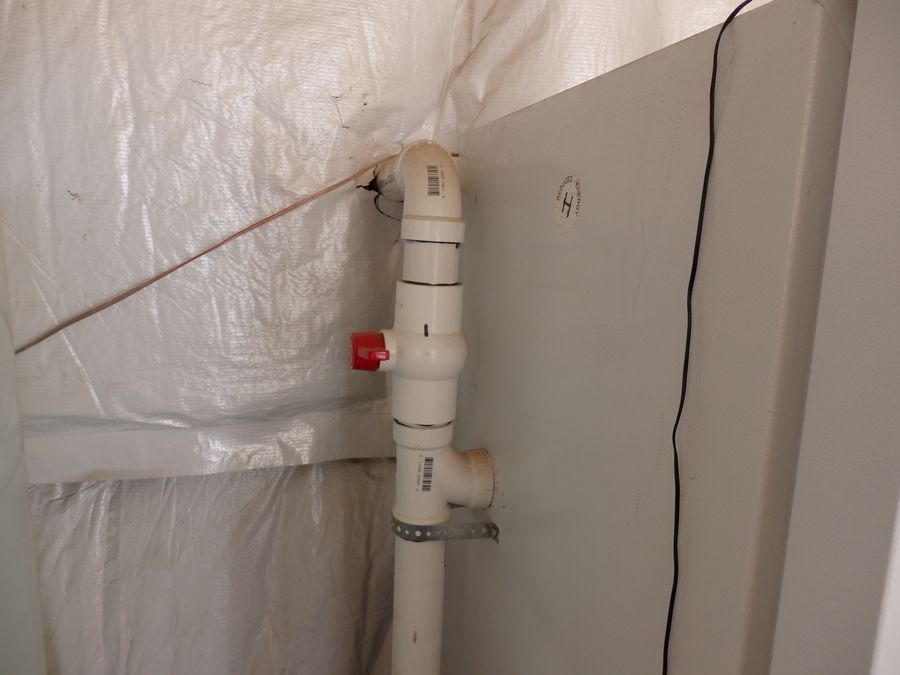
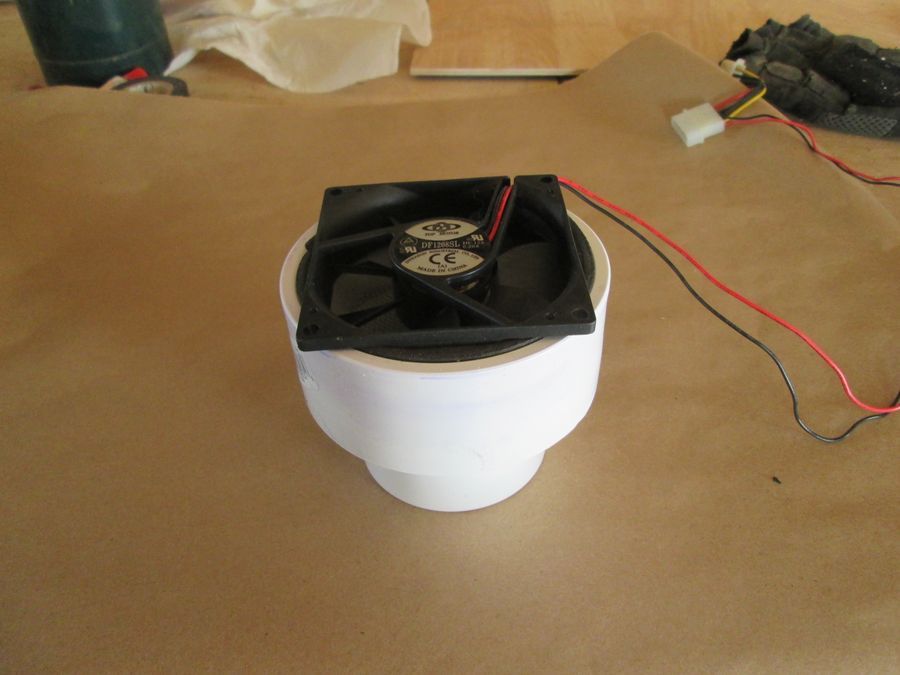
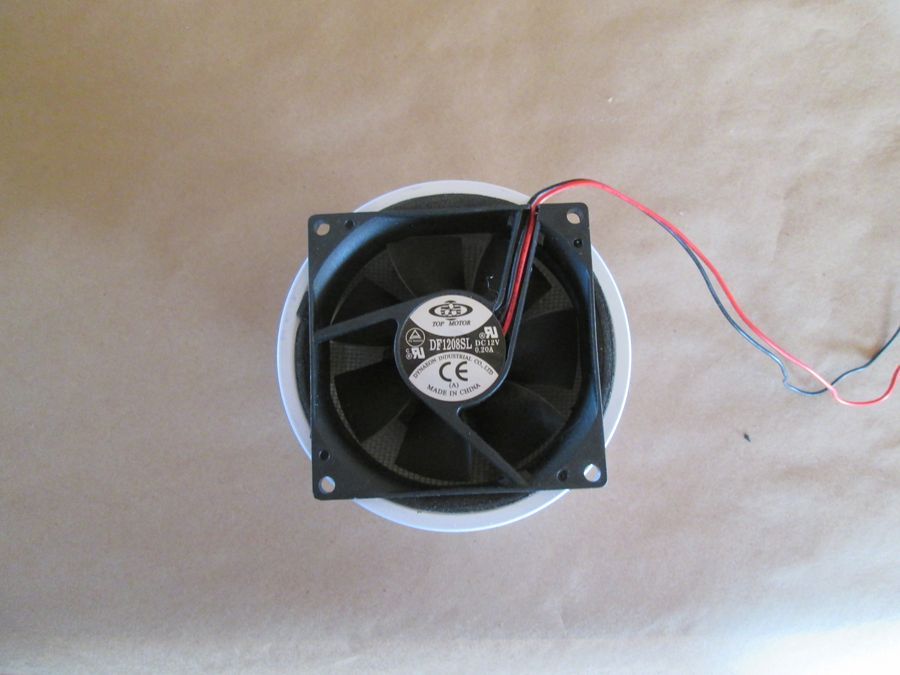
We used 2" PVC pipe for all the ventilation - mainly because it is the largest diameter we could find shut-off valves for. The idea was to vent the fresh air intake to the outside with a shut-off valve to control how much really cold air is brought into the upper and lower compartments. On the other side of the refrigerator, exhaust pipe was added to let the out-gassing escape and create the flow for fresh, colder air. Once the PVC was measured, cut and glued - we used plumbing strap to hold them in place. We added a 12 volt computer case fan to the top of the exhaust pipe (on a switch) to aid the natural air flow when needed.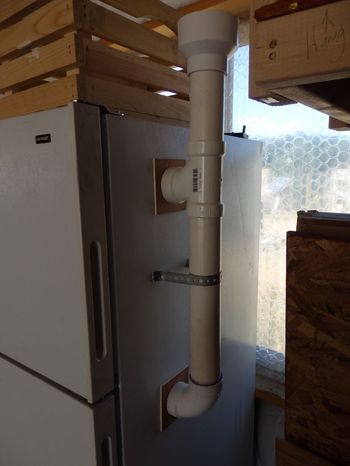
To further aid the natural air flow, the fresh air pipes were mounted through the sides at the bottom rear (the rear of the side, not the back of the unit)of the top/bottom compartments and the exhaust ports at the top front. This allows the cooler fresh air to come in from the bottom and allow the warmer stale air to naturally escape from the top. Not shown in the photos is the PVC elbow on the outside of the building for the fresh air intake. It is angled at 45 degrees to keep out rain/snow and we added a piece of bug screen to keep insects/pests from getting into the storage areas.
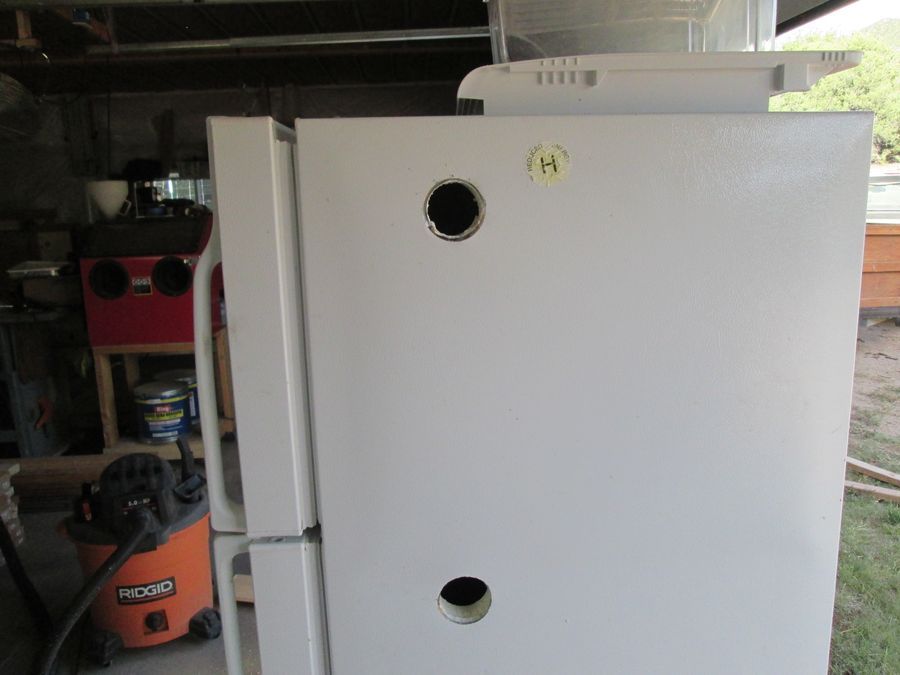
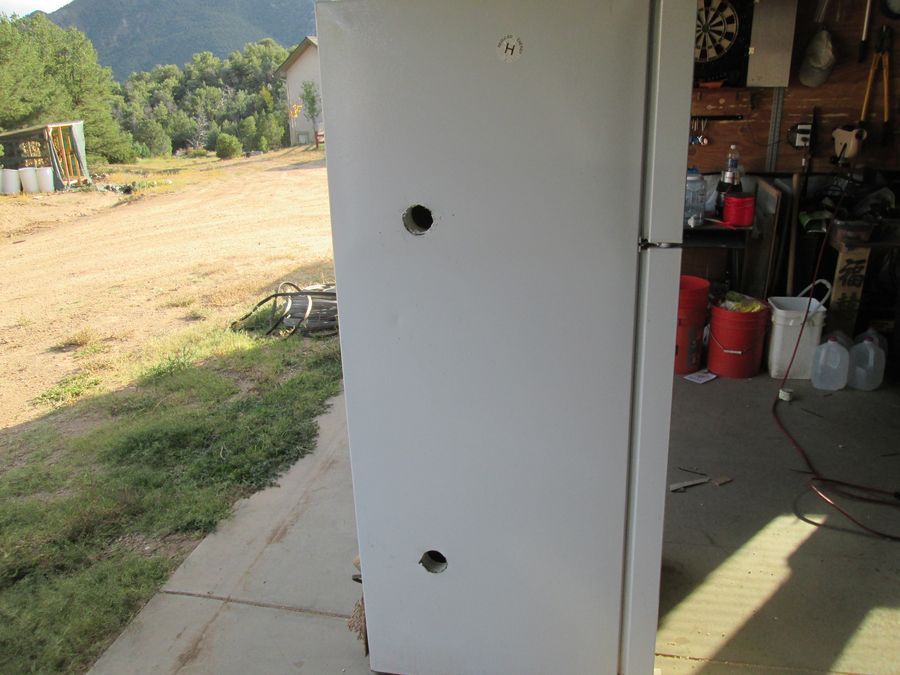
Here are some things we learned or are not apparent in the photos. On the first unit we did we wanted to make the holes going through the sides neat and clean so used a 2 1/2" bi-metal hole saw. Total fail! Don't know if it is the stainless steel skin or the fact the skin is textured, but it destroyed the teeth on the brand new brand name hole saw in a matter of seconds. We used three to get the four holes through and had to cheat with an angle grinder with metal cut-off blade on the last one.
Solution: Drill a pilot hole all the way through for each hole. Use the hole saw from the inside to easily go through the plastic and insulation until it hits the metal skin. Then measure and mark out a 2 1/2" square centered on the pilot hole. The angle grinder with metal cut-off blade quickly and easily cuts the square through the steel skin. Then a little nudge with a hammer from the inside and the entire plug (plastic, insulation, metal) pops right out.
To give the lip of the PVC elbow something to rest against and to cover the not so neat angle grinder cuts, we cut some 3" x 3" squares from 1/4" plywood and used the hole saw to put the pipe size hole in the center.
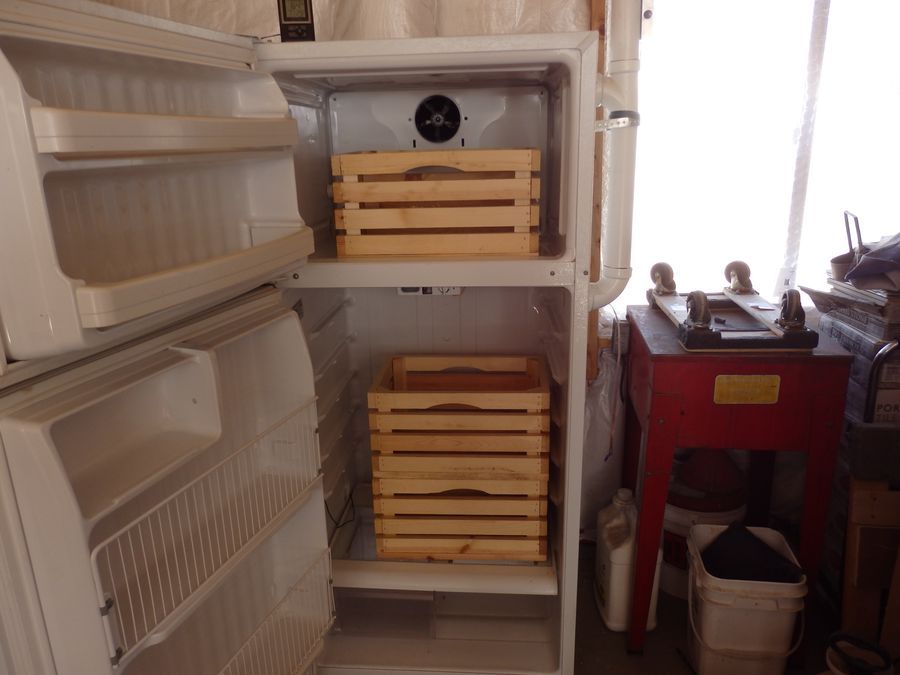
The top freezer refrigerator works very well for this purpose as apples should be stored separately from potatoes and such so they are kept in the top freezer section. One of the bottom bins is used for water to maintain the humidity and the other we fill with damp sawdust and carrots.
NOTE: It was over a year ago when we built the first such unit. We wanted to fully test it for a season before making this post. It worked like a charm! So much so that a neighbor wanted to build a few and found four very clean units from an apartment complex. A couple of the photos show the last batch of four in production.
This conversion can be done with any refrigerator or chest freezer although having two separate compartments is desirable depending on what you plan to store. Obviously not every single detail of such a conversion is covered in this post, so if you plan to tackle such a project and have questions, just use the form below to ask.


Safety First:
Despite what you may see in photos or descriptions of our projects - ALWAYS follow manufacturer's safety guidelines when using tools or equipment. Always wear safety glasses, gloves and full body-armor if necessary. While it may appear we don't always do so, we can not be held responsible if you do not.